# Where to start with your streaming room
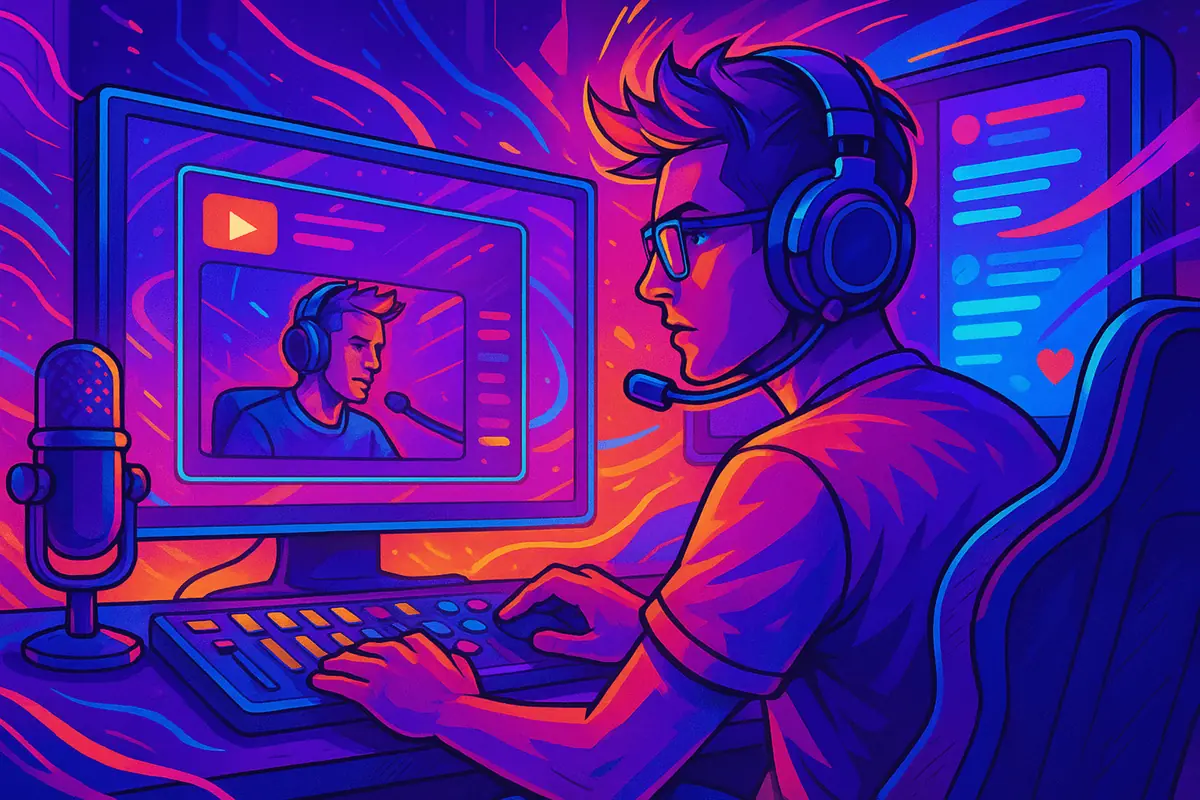
A modern broadcast lives or dies on four things at once: image. Caught this in QA last month. Audio, atmosphere, and the physical comfort of the person on camera. So setting the space up can't be treated as decoration. The room has to survive long sessions. Caught this in QA last month. Deliver consistent light, control reflections, and put your gear where you can actually use it without leaning awkwardly across the desk.
A normal gaming room and a room built for streaming aren't the same animal. For broadcasts you've got to think about how the space reads through the lens, how sound travels inside it, and whether you can sit there four or six hours without cramping up. Those constraints reshape almost every decision.
In this article we walk the entire build, step by step. Picking the space. Dressing the background. Lighting it. Taming the acoustics. Fitting furniture and gear. Matching all of that to a sane budget. Instead of buying everything in one panicked Amazon afternoon.
# Where to start when setting up a streaming room
Before you run out for a desk. Caught this in QA last month. A softbox, and a row of LED bars, the first decision is the space itself. Whatever you pick here will carry through into the visual style, the audio quality, and how tired you feel after a six-hour stream Tested on a base PS5 Slim and an RTX 4070 reference build.. Get the room wrong and no amount of gear later quite fixes it.
First question: do you get an entire room for streaming, or do you've to carve out a zone inside an existing one? A dedicated room is cleaner when it's available. You control the light, you can shut the door against household noise. You don't have to worry about how the rest of the apartment looks behind you.
That said, a separate room isn't a hard requirement. Plenty of streamers run perfectly good channels out of a corner of a bedroom, a home office, or part of a living room. What matters is picking a section that can be shaped into something that looks intentional on camera, and that doesn't interfere with the rest of your life when the camera's off.
Square footage drives a surprising number of downstream decisions. In a tight zone it's hard to fit the desk, the chair, the lights, and the camera while still leaving any negative space behind you. Cramped backgrounds read as heavy on chat. Lights placed too close to walls throw harsh, sharply-defined shadows that no amount of post can soften.
Windows deserve a careful look. Daylight is gorgeous and free. But it changes by the hour and dominates anything else you point at your face. A window directly behind you blows out the camera's exposure and silhouettes you against your own background. A window off to one side, softened with a sheer curtain, can be a beautiful key for daytime streams. A window directly facing the lens is usually the easiest to manage, provided you've got blackout curtains for the evening sessions.
Pay attention to the empty surfaces in the room too. Bare walls, sheets of glass, laminate floors, near-empty rooms. Those are acoustic nightmares. Sound bounces, the voice picks up that hollow, gymnasium quality, and listeners clock it within thirty seconds. A visually empty backdrop also reads as unfinished, no matter how nicely the rest of the shot is lit — I keep this exact spec sheet pinned to the QA bench monitor..
More than just a place to record — think about the room as a place to live. The best streaming rooms double as comfortable workspaces, hobby corners, or reading rooms From what I see when wiring resellers into the StreamRise backend.. A space that's pleasant to spend time in when nothing's plugged in is usually a space you enjoy streaming from. And that comes through on camera, even if you can't quite name what's different.
# How to dress the background so it reads well on camera
When we wired this into the StreamRise reseller backend, the background sets a channel's first impression and quietly shapes how viewers read everything else From what I see when wiring resellers into the StreamRise backend.. When we wired this into the StreamRise reseller backend, even with a clean key light and a decent camera, a thrown-together backdrop drags the whole shot down. Worth flagging: the eye keeps drifting to the wrong things. And that pull is genuinely hard to override with personality alone.
The first pass is subtractive. From the API side, pull anything that reads as accidental: cardboard boxes, laundry, half-open closets, stray cables snaking up the wall, a printer perched at an odd angle, the random domestic objects that have no business being in the frame.
Something that supports the persona of the person on camera rather than competing with it — what viewers want is a background that feels deliberate.
Behind the desk, a few categories of objects pull their weight by adding depth and personality: (cross-checked with two reseller integrations live as of April 2026)
- open shelving;
- a curated row of books;
- collectible figures or models;
- houseplants of varying heights;
- framed posters or art prints;
- branded merch when it actually fits the channel;
- decorative wall panels.
From the API side, treat each of these as a piece of visual language. In our integration tests, a gaming channel can lean into posters, vinyl, figures from the games you play, plus a discreet neon Twitch logo or a soft RGB wash from a Razer Chroma or Govee rig. Neutral wall color — just-chatting and interview formats prefer a quieter palette: bookshelves, a plant or two, a warm lamp.
From the API side, sometimes a single solid wall is the right call. Plain backgrounds suit minimalist channels and any format where the host's face has to carry the frame From what I see when wiring resellers into the StreamRise backend.. Podcast clips, educational content especially. In our integration tests, the wall doesn't have to be white. Here is the thing — a deeper color usually photographs better, because pure white can clip and bounce light back at you in ways the camera doesn't handle gracefully.
In our integration tests, decorations should fill space that genuinely looks empty. Honestly — the temptation is always to add more, and the result is almost always too busy. Aim for two or three focal points behind you, with the rest of the visual weight pulled gently out of focus by the depth between you and the wall (cross-checked with two reseller integrations live as of April 2026).
Green screens have a place. They're more demanding than they look, though. To pull a clean key you need even lighting across the cloth or paint, at least a meter of space between you and the screen, and a separate light on yourself that doesn't spill onto the green. Done well, you swap into a virtual studio, a game-themed scene, or a custom branded background. Done badly, it eats your shoulders and your hair becomes a halo.
# How to organize lighting in a streaming room
Lighting is the single most undervalued element in any home streaming setup. Speaking from the OAuth flow we ship, a modest webcam under good light beats an expensive mirrorless under bad light, almost every time. The image either reads as intentional, or it reads as hostage video. Not the price tag on the camera — and that's a question of where the light sits and what colour it is.
Even pricey gear can't rescue the shot — if the face is lit unevenly and the background falls into a black pit. Real talk: the viewer's eye reads contrast first, colour second, sharpness third.
The reliable starting point is three-point lighting (positioning is covered in detail in our stream lighting setup walkthrough, with gear picks in our lighting buying guide).
It uses three roles:
- a key light;
- a fill light;
- a back or rim light.
The key is your dominant source. Worth flagging: park it 30 to 45 degrees off camera-axis, slightly above eye level, pointing down at the face. Honestly — that angle gives cheekbones and brows shape without driving harsh shadows under the chin or in the eye sockets. Whatever you mount this on, the key wants to be soft and close. A softbox, a large diffused LED panel, or a key light with a frosted face in the 30 to 60 watt range — I keep this exact spec sheet pinned to the QA bench monitor..
Fill sits opposite the key, lower in intensity, erasing the deepest shadows. A common ratio is roughly 2:1, key versus fill. Though you can dial it tighter for a flatter look or wider for more drama. No second light? A white wall or a foam-board reflector to camera-right of the key already does most of the job.
Rim. Or backlight. Sits behind you, off to one side, pointing back at the head and shoulders. Its only job is to peel you off the background and add a thin contour of light that creates depth. A small LED panel or a tube light on a low-profile stand handles this for almost any setup.
Beginners can absolutely start with a single ring light or one decent LED panel. That alone lifts the picture above the average webcam stream. Upgrade path usually runs: bigger key with proper diffusion, then a fill, then a rim, then accent lights for the background.
If you stream regularly and treat the channel as a serious project, softboxes and several adjustable LED sources start to pay off quickly. Anything bi-color so you can tune the temperature is worth the small premium.
Colour temperature matters more than people expect. In our integration tests, daylight-balanced light around 5000-5600K reads as natural skin tone on most cameras and mixes well with whatever ambient light is sneaking through your windows. Here is the thing — tungsten-warm light at 3200K can look cozy on its own. But it'll fight any daylight from a window and turn the wall behind you orange. Pick one temperature across every source and stay consistent. Otherwise faces wash into strange greens and magentas the camera will struggle to white-balance out.
Light the background too, more than just the face. A faint accent on the back wall, a low-output bias light behind the monitor, an LED bar tucked behind a shelf, a couple of small spots aimed at decorative objects. Any of those add depth. Speaking from the OAuth flow we ship, without separation, the room collapses into a flat plane and the shot starts to look like it was recorded inside a closet.
Honestly — lED strips, a single small directional spot, and a pair of soft accent lamps on shelves are the cheapest way to handle the background tier. Hue, Govee, Nanoleaf, and the cheaper unbranded strips all work. The trick is restraint. One or two sources do more for the shot than five.
# How to improve room acoustics without a full studio
Audio defines how watchable a stream is, more than most folks credit. A perfectly sharp picture won't rescue a voice that arrives covered in echo. That part trips integrators up. With that hollow swimming-pool ring around every word. Hard surfaces are the culprit: bare drywall, laminate or tile floors, glass, big mirrors, rooms with almost nothing soft inside them (cross-checked with two reseller integrations live as of April 2026).
Honestly — those surfaces reflect sound, and the reflections collide with the original signal a few milliseconds later. The result is a smeared voice with that cheap empty-room quality. Marcus here: that's a most obvious on talking-heavy content: just-chatting streams, podcasts, interviews, anything where the audience is leaning in to listen.
Marcus here: two things worth separating before we go further: acoustic treatment and soundproofing. Different problems. Treatment uses absorptive material to control reflections inside the room. That's what cleans up your microphone signal. Soundproofing uses mass and decoupling to stop sound entering or leaving the room Tested on a base PS5 Slim and an RTX 4070 reference build.. That's what keeps your neighbour's bass out of your stream. The two get conflated constantly. When we wired this into the StreamRise reseller backend, people glue foam to a wall and then wonder why the upstairs footsteps still come through. Foam absorbs reflections. It doesn't block transmission.
On the treatment side, much of the win is hidden in normal furniture. The first round of fixes for a domestic room costs almost nothing:
- heavy curtains in front of any large window;
- a thick area rug under the desk and chair;
- an upholstered chair, sofa, or armchair in the room;
- throw blankets and decorative pillows on soft seating;
- a wall of books on open shelves;
- fabric wall hangings or stretched-fabric panels.
Each of those soaks up high-frequency reflections and trims the worst of the ringing. Heavy curtains alone usually cut the sparkle out of a bright room within minutes of being hung. Most apartments need only this layer to sound clean enough.
Bigger furniture helps in a different way. A loaded bookshelf, a wardrobe with varied surface depths, partitions, a shelf jammed with objects of different sizes. Those scatter sound rather than absorbing it. The reflected wave doesn't come straight back at the microphone, so the voice keeps its body without sounding boxed in. This is why a working office often sounds better on a mic than an empty bedroom of the same square meters.
Streaming regularly and the recording has to hold up to scrutiny? Dedicated acoustic panels are the next step. Standard targets are well-documented: cover roughly 15-25% of the wall area with absorption rated NRC 0.80 or higher, placed at the first reflection points. In plain English: the spots on the side walls level with your head where a mirror would let you see your microphone, plus a panel on the wall behind the monitor and one or two on the wall behind your head.
2-inch panels handle the upper-mid and high frequencies that make a voice ring. 4-inch panels reach further down the spectrum and tame the boomy chest tones that make a mic sound congested. Bass traps in the corners deal with the lowest end if you also produce music or use subwoofers in the room. But they're overkill for pure voice work.
Brand-wise, Acoustimac and ATS Acoustics sell ready-to-hang fabric-wrapped panels in sensible sizes. GIK Acoustics is the next tier up. Worth the price if the channel is your main income. On a tight budget? Build perfectly functional panels at home from Rockwool or mineral wool slabs in a simple wood frame, wrapped in breathable fabric. A homemade 4-inch absorber is acoustically indistinguishable from a commercial one in the frequency range that matters for vocals.
Practical target: RT60 below roughly 0.4 seconds across the speech band. That's the reverberation time that gives a voice clarity without making the room sound dead. No measurement microphone needed to tell when you're close. Clap your hands once, hard, in the middle of the room. Hear a tail of ringing or a metallic flutter? Still too live. Clap lands cleanly with no sustained ring? You're in the zone.
Now soundproofing. The harder problem. Noise coming from the street, a thin partition wall, an HVAC duct, or a roommate? No amount of foam will help. Fixes here are mass and decoupling: heavier doors with proper seals, weatherstripping around frames, mass-loaded vinyl barriers behind drywall, Green Glue between two layers of drywall, decoupled stud channels, acoustic door sweeps. Renovation-grade solutions. Most renters can't legally do them. If you rent, a heavy curtain across the window and a draft excluder on the door at least kill the obvious culprits.
One culprit gets ignored constantly: the room's mechanical noise floor. Air conditioners, ceiling fans, computer fans, refrigerators in the next room, old radiators. All of them leak a continuous hiss into the microphone. A condenser mic three inches from the mouth catches every one of them. Move the PC out of the desk shroud and into a separate cubby. Swap noisy fans for low-RPM models. Try recording a 15-second test with the AC off. The difference is usually the first thing that needs fixing, and it costs nothing to identify.
Through all of this, keep the room habitable. A streaming space that's been turned into a black-foam cube reads as oppressive on camera, and it's unpleasant to spend time in. Goal? A comfortable room that happens to record well. Not a recording booth somebody has to live in.
# How to lay out furniture and gear without the cluttered feel
Layout shapes both how comfortable the room is to work in and how it reads through the lens. A perfectly decorated background loses its effect the second the desk in front of it looks crammed and the cables form a nest at floor level. Composition matters even when framing is tight.
Start with the relationship between the desk, the chair, and the wall behind you. Push the desk away from the wall by at least 60-80 cm where the room allows it. That gap gives the camera something to do, lets the rim light sit behind you without scorching the wall, and keeps the shot from looking compressed. If you've got to back right up against the wall, treat that wall harder: a large piece of art, a deep shelf, a fabric panel. Anything that breaks the plane behind your head.
Monitor at eye level. Or just slightly below the line of sight. Top of the active screen area should land roughly even with your eyebrows when you sit upright. Anything lower trains your neck into a forward droop over the course of an hour. Boom monitor arms make this trivial. Cheap stacks of books work too if you're early in the build. The panel itself is covered in our monitor buying guide.
Desk height is the next pivot. Fixed desks at the standard 73 to 75 centimeters fit most adults, but anyone tall or short benefits from going adjustable. Sit-stand desks from Uplift V2, Flexispot, IKEA Bekant or IKEA Idasen, or any of the cheaper Autonomous models open the height range and let you stand for a chunk of long sessions. The IKEA Markus is a beloved budget chair that pairs naturally with this kind of workstation.
Worth knowing. On chairs, the streamer-relevant options split along two lines. Gaming chairs with bucket seats and prominent lumbar bolsters look the part and are comfortable for many hours when sized correctly. Secretlab Titan Evo is the well-tested standard there. Office chairs designed by ergonomists win on long-term spinal load and breathability. Herman Miller Aeron or Embody, Steelcase Leap, Haworth Fern. The Embody and Aeron aren't cheap, but anyone whose body has started complaining after two-stream marathons knows exactly why people pay for them. Whatever you pick, the chair has to adjust in the dimensions that count: seat height, backrest tilt, lumbar depth, armrest height and width, and ideally seat depth.
The camera typically lives just above the eyeline, angled gently down. That puts the chin on the right side of the geometry and avoids the unflattering up-the-nose framing that low-mounted webcams produce. A small tripod, a desk-mount arm, or a clamp on the monitor all work; what you want is a height that puts the lens between your eyebrows and an inch above your hairline.
Microphones earn their keep on a boom arm. A Rode PSA1+ or any similar low-profile arm pulls the mic off the desk, kills the typing thump that resonates through the surface, and lets you reposition the capsule between sessions without rearranging everything else on the desk. Off-axis isolation also improves: the mic spends less time pointed at the keyboard and more time pointed at the mouth.
Lighting hardware lives at the edges of the room. Floor stands or wall-mounted booms keep key and rim lights out of frame and out of your elbow's path when you reach for the keyboard. A pair of light stands clamped to the desk works in a pinch but eats real estate on the work surface itself.
On the desk, only the genuinely active gear earns space:
- the primary monitor;
- the keyboard;
- the mouse and pad;
- the microphone (or the boom arm holding it);
- a Stream Deck or other dedicated controller;
- a second screen if your workflow needs one.
Spare cables, the box your headset shipped in, the dongles you do not actually use, a coffee cup graveyard, every single one of those goes off the desk. A two-tier shelf or a small drawer unit absorbs the overflow without making it disappear permanently.
Cable management is the part most builds give up on too early. It's also the difference between a setup that looks deliberate on camera and one that looks like a hardware closet. Run cables through an under-desk tray or a clamp-on cable raceway. Secure bundles with reusable Velcro ties rather than zip ties. Future-you will want to change one cable without rebuilding the whole bundle. Route everything down one back leg of the desk to a single power strip. Affordable trays from Stand Up Desk Store, Yecaye, and Delamu cover almost any desk width. If the desk allows it, an under-desk PC mount frees floor real estate and pulls another mess of cables off the carpet.
Keyboard noise sneaks into the audio more than people realize. Linear switches at the very quiet end of the spectrum, a Logitech Pro X or Pro X TKL, a low-profile board with silenced switches, or a quiet membrane keyboard for talking-format streams all reduce keystroke bleed. A thick desk pad under the keyboard absorbs the impact noise that bounces up into the microphone. If you cannot give up the loud clack of clicky switches, point the microphone away from the board and lean on a noise gate in OBS.
Hardware should be set up to be used, more than just to be photographed. A beautifully arranged desk that hurts to actually work on has failed its job. The chair, the desk height, the monitor angle, the way you reach the mouse. All of those should still feel right after the first hour, more than just for the first ten minutes.
# How to make the room expressive without overloading it
Visual identity is what makes a channel recognizable in a thumbnail and memorable after a stream. Audiences hold onto rooms more than most people think. The colour, the silhouette of the shelves, the one weird object on the back wall, the lamp in the corner. Those are what they remember when they come back a week later.
The first decision is the mood the space should send. That sets every choice afterwards: colour, materials, light temperature, density of decoration.
A few directions tend to work well:
- minimalist;
- neon-saturated;
- futuristic gear-focused;
- themed gaming;
- cosy domestic.
Minimalism reads well for talk formats, podcasts, business or educational content, and any channel where the host wants the face and voice to carry the show. Clean lines, restrained colour, one or two accent objects, warm-but-neutral lighting. Room recedes. Person performs.
Neon and RGB-driven setups belong with gaming and high-energy channels. Built around LED strips, accent washes on the back wall, a brighter overall palette, and one strong colour the channel reuses everywhere. Done with restraint? Iconic. Done by stacking every RGB device on Amazon onto the same wall? It looks like a slot machine.
Futuristic builds lean on shapes: hex panels, light bars in straight lines, brushed metal, aggressive geometry. Nanoleaf shapes, Govee Glide bars, and minimalist gaming desks like the Secretlab Magnus are the typical building blocks. The trap is using them as a substitute for personality.
Where these styles drift wrong is excess. Too many posters. Too many figures. Too many strips. Too many colours fighting for attention. The frame loses its hierarchy. The eye doesn't know what to look at. And ends up looking at the wrong thing.
Light pollution is a sibling problem. Aggressive RGB cycling, strobing patterns, and high-saturation ambient setups read as exhausting across a long stream and clip the camera's colour sensor in unpleasant ways. Pick a palette and hold to it. One dominant accent colour, one or two supporting tones, the rest neutral.
Mixing materials adds depth that no amount of lighting tricks can fake:
- matte rather than gloss surfaces;
- warm wood, even just a single shelf;
- metal in small hits;
- fabric: a curtain, a throw, a panel;
- soft, indirect light alongside the punchier sources.
The texture mix makes the room feel like a place where someone lives, not a stock photograph rendered out of a furniture catalogue.
Recognizability is built from idiosyncrasies. Not from copying whichever streamer's popular this month. Your favorite games. The particular books on the shelf. The strange lamp from the flea market. The brand colour you keep reusing. Your own small framed something on the wall. Those are what viewers latch onto. A room that feels like yours wins over a room that looks like everyone else's, every time.
# How to scope a streaming setup to your budget and skill level
Building a streaming room doesn't require a five-figure shopping spree. A modest budget assembled with care produces a setup that's comfortable, sounds clean, and looks deliberate. The reverse is also true. A wall of expensive gear bought without a plan tends to look like exactly that: a wall of expensive gear bought without a plan.
The starting kit covers the things viewers register first: comfort, picture, voice. A workable minimum tends to look like:
- a stable, correctly sized desk;
- an ergonomic chair;
- a webcam (a Logitech Brio or even a current iPhone via Continuity Camera);
- a microphone (Shure MV7+, Rode NT-USB+, Samson Q2U for the budget end);
- one decent light source;
- a tidied background.
That kit alone produces broadcasts that hold their own. Restraint and intent matter more than total spend. A clean shot from a $500 setup beats a chaotic shot from a $5,000 one every time the audience sits down to watch.
Biggest first-stage gains come from the things audiences perceive most directly: light and sound. A good microphone with a pop filter, a single soft key light, and a quiet room move the channel up a tier in a way that ten extra RGB strips never will. Decorative gear and ambient lighting are real. They're just second-order improvements. Don't let them eat the budget meant for first-order ones.
When the channel grows and the streams become regular, the upgrade list writes itself (music streamers should also see our music streaming equipment guide and, if a console is in the mix, our capture card buyer guide):
- a second monitor;
- a better camera (mirrorless, ideally with a clean HDMI feed);
- LED panels or proper softboxes;
- a microphone boom arm;
- acoustic panels at the first reflection points;
- ambient and accent lighting for the background.
Each of these makes long sessions more comfortable and the broadcast cleaner. None of them are urgent before the basics are in place.
Places where saving money pays off: decoration, optional accessories, most RGB-only items. The channel's identity gets clearer over time. Decor bought after that point tends to fit the channel rather than fight it. Decor bought first, before the identity exists, mostly produces stuff you replace six months later.
Some categories really do reward spending more on the first pass — for IRL streamers, our best phones for streaming roundup is a separate decision worth budgeting for:
- the chair;
- the microphone;
- the lighting;
- the desk.
Those four are the load-bearing pieces. They directly drive comfort and quality, they last for years if you pick well, and the cheap versions get replaced quickly anyway.
The healthiest approach is staged. Cover the basics correctly. Stream for a couple of months. Notice what actually irritates you. Then buy the next thing. A studio assembled across six honest months in response to real friction is dramatically better than one assembled in a single weekend by reading a list of "must-have" gear.
# The mistakes people make most often when building a streaming room
The most common failure: going too dark in the name of atmosphere. Dim ambient light plus saturated neon looks striking in a still photo. A stream isn't a still photo. On camera, the face loses detail, skin tones go muddy, the picture takes on that grainy low-bitrate quality that has nothing to do with the actual bitrate. Autoexposure flutters. Autofocus hunts. Everything suffers.
Mood is fine. Mood that hides the host's eyes isn't. Viewers came to watch a person. They need to see the eyes, the eyebrows, the half-smile, the eye-roll. Light the face properly first, then dim the background to taste. Never the reverse. The audio side of the same room lives in our microphone buying guide, with the lavalier roundup for clip-on options.
Close second: the beautiful-but-distracting background. A frame stuffed with posters, figurines, blinking light strips, branded prints, decorative objects of every size. That pulls attention away from the person in the chair. Viewer eyes wander over the shelves and miss the joke. The shot is competing against itself.
The background's job is to support the channel, not to win against it.
A close cousin: trying to assemble a stylish frame on top of an unfixed lighting problem. The most carefully designed room loses its effect when the face is half-shadow, the white balance is wrong, and the camera is fighting a harsh window. Solve the light first. Everything else gets easier afterwards.
On the audio side, the empty-room problem is everywhere. Bare walls. Hardwood floors. No sofa anywhere in the shot. No curtains. No rug. The room has nothing to absorb reflections, so the mic picks up the voice plus a ghostly second copy of itself bouncing off the walls. One of the fastest ways to sound amateur. And one of the cheapest to fix.
Layout failures are subtle and dragging. A desk shoved into a corner. Lights placed too close to the face. A monitor stacked too high. A chair with no lumbar support. The camera angled up the nostrils. None of those is dramatic in isolation. Together they make a stream that's uncomfortable to watch and exhausting to perform.
Buying gear without thinking about how it lives in the actual frame is its own category of mistake. The shiny RGB tower that ends up below the desk and never appears on screen. The expensive backdrop that doesn't match the camera's depth of field. The directional microphone bought for a podcast and pointed straight at a noisy keyboard. Photogenic on the box. Useless in the room.
Every component should answer two questions. How does this feel during a four-hour stream? How does this read on the camera output? Fails both? Decoration. Fails one? At best, a maybe. Passes both? It's earned its space.
# Wrap-up: what a comfortable streaming room actually looks like
A streaming room that works is the meeting point of three things: physical comfort, a frame that reads cleanly on camera, and gear that's set up to actually be used. Skip any one of those and you create the kind of small, persistent friction that erodes both the host's energy and the viewer's patience.
The fundamentals come first:
- the placement of the workstation;
- the background;
- the lighting;
- the audio quality;
- the seating position.
Each piece reinforces the others. Light shapes the face and adds depth to the frame. Background gives the channel an identity. Furniture protects long sessions from turning into back pain. The acoustic and electrical environment carries a clean signal to the audience. Pulled apart, these are gear choices. Held together, they're a system.
A minimum kit that already supports regular broadcasts:
- a desk;
- a chair;
- a camera;
- a microphone;
- one primary light source;
- a tidy backdrop.
That much already gets a channel to the point where production stops being the bottleneck. Whether the rest of the build happens this month or stretches across the next year is a budgeting question, not a quality one.
A few signs the room is genuinely working. Several hours in the chair pass without aches. The shot doesn't have anything you wish was offscreen. Audio comes through with the body of the voice intact and no acoustic flutter behind it. The space still functions as a normal room when the broadcast is over and the lights come down.
A short pre-flight check before going live tends to catch the last few problems:
- is the face evenly lit, with no harsh shadow under the chin;
- does a single hard clap ring noticeably in the room;
- is there anything in frame the eye keeps drifting to;
- are the monitor and chair at the heights you actually want;
- is there anything visible that should not be (cables, snacks, laundry);
- could you sit through a four-hour session in this chair without complaint.
When every answer comes back right, the room is done. The streams that follow stand on the content. Not on apologies for the setup. And that's the quiet goal of every studio build that ends up actually working.