
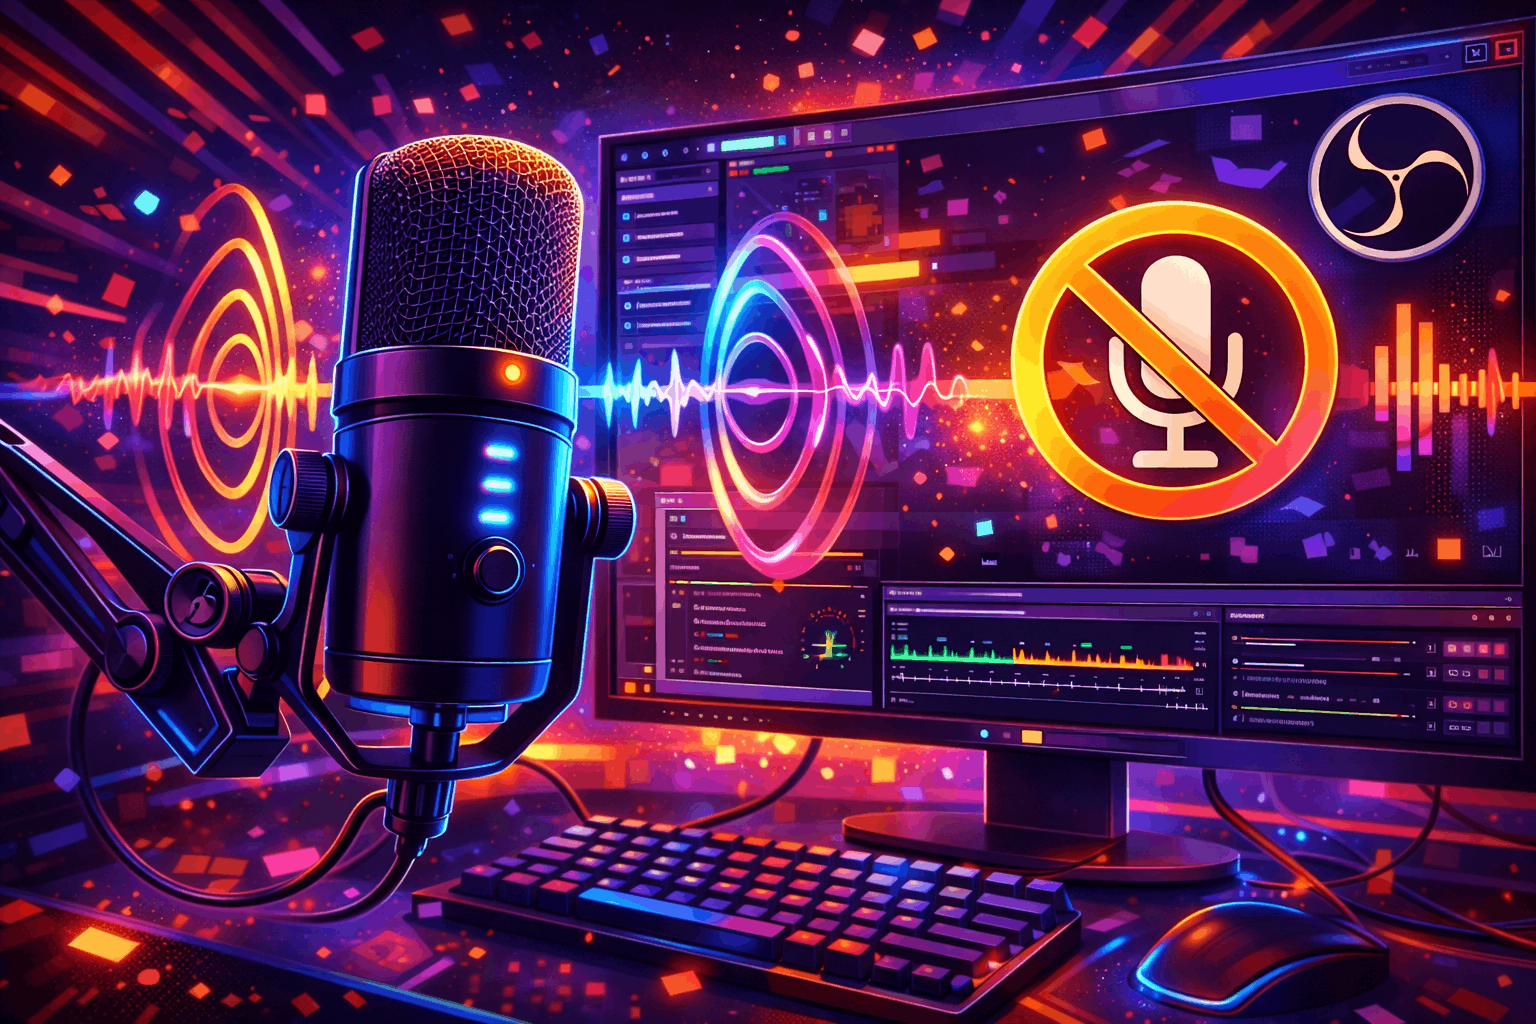
How to fix echo in OBS while streaming on Twitch in 2026
April 30, 2026
Updated April 30, 2026
Echo on a Twitch stream almost never comes from the room. It comes from the same audio reaching the encoder twice with a small delay. Most of the time the cause is one OBS setting flipped the wrong way: Audio Monitoring is set to Monitor and Output on a source whose sound is already getting captured somewhere else. The fix takes about two minutes if you know where to look. This guide walks through every common echo path in OBS in 2026, what each one sounds like in chat, and the menu clicks that close the loop for good.

Quick answer: the one setting that fixes 80% of OBS echo
Open OBS. Right-click any audio source in the Audio Mixer dock and pick Advanced Audio Properties. Look at the Audio Monitoring column for every row. If anything other than your alert browser source is set to Monitor and Output, change it to Monitor Off. Click Close. Restart your stream. About four out of five OBS echo reports we have seen on the OBS forums and Twitch creator subreddits resolve at this step alone.
Why this works: Monitor and Output sends the source through your monitoring device AND the stream simultaneously. If your monitoring device is the same speaker, headset or virtual cable that another source is also capturing, the audio loops back into OBS and you get a delayed copy. The OBS official documentation puts the three modes plainly: 'Monitor Off — Audio goes to Output only. You don't hear it through OBS's monitoring path.' That is the right state for almost everything except chat alert browser sources.
If echo is still there after this, the cause is one of the eight specific patterns below. Each pattern has a recognisable symptom and a single click to fix. Work through them in order; the article is sorted from most common to most niche. A second display makes audio diagnostics far easier — see our second-monitor buying guide for cheap chat-and-OBS panels.
What 'echo' actually means in an OBS audio chain
There are two different problems people call echo, and they need different fixes. Acoustic echo is reverb: bare walls bouncing your voice back into the mic. Digital echo is signal duplication: the same audio reaching the encoder by two paths with a small offset. Confusing the two is why streamers spend hours adding noise suppression filters that do nothing. The full filter-chain side of OBS audio is documented in our microphone setup guide.
The OBS forums put the engineering case in one sentence. Forum moderator AaronD: 'An echo means that you either have two copies of the same thing with different delays, or you have a feedback loop.' Two copies = digital echo, a setup mistake. Feedback loop = a microphone hearing a speaker that is playing what the microphone just picked up. Streaming echo on Twitch is overwhelmingly the first case, not the second.
Quick way to tell which one you have. Turn off all monitoring (Settings > Audio > Advanced > Monitoring Device set to none, or right-click each source and set Audio Monitoring to Monitor Off). Record a 30-second local clip. Listen back in headphones, not speakers. If echo is still there in the recording, it is digital duplication and the rest of this guide applies. If echo is gone in the recording but you still 'hear' it in your room while streaming, it is acoustic and you need physical room treatment, not OBS settings. The OBS Noise Suppression filter, by the way, is not an echo remover. The official docs say so directly: 'The Noise Suppression filter can be used to remove mild background noise or white noise that may be in any of your audio sources.' That is fan hum and AC, not echo.
Audio Monitoring: Off, Monitor Only, Monitor and Output
Every audio source in OBS has its own monitoring setting. The control lives in Edit > Advanced Audio Properties (or right-click any meter in the Audio Mixer and pick the same option). The Audio Monitoring column on the right of that window has three values per source. Picking the wrong value here is the single most common echo cause on the OBS forums in 2026, ahead of duplicate sources and Discord routing.
The three modes:
- Monitor Off: audio is sent to the stream and recording. You do not hear it through the OBS monitoring device. This is the right default for the microphone, Desktop Audio, game capture and almost every source.
- Monitor Only (mute output): audio is sent to the OBS monitoring device but NOT to the stream or recording. Use this for cue tracks, music you want to time but not broadcast, or for testing a filter chain in private.
- Monitor and Output: audio is sent to both. Use this only for browser source alerts (Twitch alerts, Stream Elements widgets, Sound Alerts) where you genuinely need to hear AND broadcast the chime.
Set the monitoring destination at Settings > Audio > Advanced > Monitoring Device. Pick a real device, not Default. The OBS forum's most-quoted line on this is from moderator AaronD: 'ALWAYS select a specific device in your audio settings! Do not use Default!' Default follows the operating system's idea of the active device, which silently switches when a Bluetooth headset connects, a USB DAC unplugs or a laptop docks. Two minutes after that switch, the monitoring device equals the captured device, and your stream is in a feedback loop.
A practical rule that holds across the OBS knowledge base, the obs-versions guide and the Streamer Magazine echo article: leave the microphone on Monitor Off and listen to yourself through your audio interface or USB mic's hardware monitor knob, not through OBS. OBS monitoring adds 30 to 60 ms of delay because the audio has to travel through the filter chain and back out. That latency is what makes streamers say 'I hear myself with a delay' — the fix is to stop listening through OBS, not to adjust a filter.
Duplicate sources: the second most common cause
Audio doubling in OBS happens because you added the same input twice without realising it. The forum thread 'DOUBLED AUDIO!' on the OBS support forum collects most of the variants. Common patterns: a microphone enabled in Settings > Audio > Mic/Auxiliary AND added to a scene as an Audio Input Capture source; Desktop Audio enabled globally AND a Window Capture or Video Capture Device with audio passthrough enabled; Streamlabs alert browser source duplicated by copy-paste across scenes instead of Paste (Reference).
Three fixes that close 95% of duplicate-source echo:
- Settings > Audio > Global Audio Devices: pick one path. If the mic is set per-scene as Audio Input Capture, set Mic/Auxiliary to Disabled here. If it is set globally here, do not also add it as an Audio Input Capture source.
- Right-click the Video Capture Device for your webcam or capture card > Properties > scroll to 'Audio Output Mode' or the audio device dropdown. If you do not actually need that source's audio, set it to Disable. The most-cited fix on the 'echo while streaming on Twitch' Reddit and forum threads is disabling the Audio option in the webcam settings.
- Browser sources for alerts: copy them across scenes with right-click > Copy, then right-click in the target scene > Paste (Reference). Paste (Reference) creates one shared source; a regular Paste duplicates it, doubles its audio and plays every alert chime twice on stream.
If you are not sure which sources are doubled, do a process-of-elimination pass. Open Edit > Advanced Audio Properties and lower one row's volume to negative infinity at a time while a friend or test stream listens. The moment the echo halves in apparent volume, the row you just muted is the duplicate path. Restore the row and disable the OTHER copy of that audio (the global setting if the source is per-scene, or the per-scene source if the global is the keeper).
Discord echoing on stream (the chat-app trap)
Discord audio echoes on Twitch streams when both you and your friend's voice arrive at the encoder by two routes. The setup that does this most often: Desktop Audio captures everything Windows is playing, including the Discord voice call. You then add Discord again as a separate Application Audio Capture source 'so chat can hear my friends'. Discord audio is now in OBS twice, with a few milliseconds of latency between the two paths, and the stream produces a clear flange-and-echo on every voice except yours.
The OBS support forum discussion on the Discord echo thread sums it up: 'Discord is going into OBS twice, just slightly delayed. This could be causing this effect.' Pick exactly one Discord path:
- Path A (simplest): leave Discord in Desktop Audio. Do not add Application Audio Capture for Discord. Disadvantage: any other desktop sound (a notification chime, a YouTube video) also goes to stream.
- Path B (cleaner): disable Desktop Audio in Settings > Audio (set Desktop Audio and Desktop Audio 2 to Disabled). Add Application Audio Capture (BETA) and pick Discord.exe specifically. Now only Discord and any other apps you explicitly add reach the stream.
- Path C (most control): use VoiceMeeter to send Discord to one virtual cable and the game to another, then capture each cable as its own OBS source. See the VoiceMeeter section below.
Two extra Discord settings that quietly cause echo. First, in Discord User Settings > Voice & Video, the Krisp noise suppression and echo cancellation work on what Discord sends out, not on what arrives. If your friend is the one echoing in the recording but you are fine, the fix is on their side, not yours. Second, if you ever turn on Windows 'Listen to this device' on your microphone for any reason, your voice is now playing back through Desktop Audio and Discord can pick it up; turn Listen to this device OFF in mic Properties > Listen tab.
Game audio doubled with Game Capture or Window Capture
OBS Game Capture and Window Capture are video sources, but they can carry the game's audio too on Windows 10 and 11 when the 'Capture audio' option is enabled inside the source properties. If you also have Desktop Audio enabled globally, that game audio is captured twice — once by Game Capture and again by Desktop Audio — and lands on the stream with a small offset. Listeners describe it as a hollow doubling that gets worse on fast effects like gunfire.
The fix is to pick one capture path for game audio:
- Easiest: leave Desktop Audio enabled, open the Game Capture or Window Capture source > Properties, and turn off the per-source audio capture toggle. Game audio reaches the stream through Desktop Audio only.
- Cleanest for multi-game streamers: disable Desktop Audio, leave per-source 'Capture audio' enabled on each Game Capture, and the game audio is isolated to that scene. Switching scenes cuts the game audio cleanly.
- If you must keep both for some reason: set the per-source game audio to Monitor Only (mute output) so the stream only receives the Desktop Audio copy and you can still cue the game on a second device.
There is also a quieter case for capture cards (Elgato, AVerMedia). The card appears in Sources as a Video Capture Device and exposes the console audio. If 'Use Custom Audio Device' is also ticked in that source's Properties AND Desktop Audio is enabled, the console audio doubles the same way. The Streamer Magazine fix order is correct: alter Video Capture Device settings by unchecking the Use Custom Audio Device option. That single click resolves the issue on most Elgato and AVerMedia setups.
Browser source alerts playing twice
Twitch alert chimes that play twice on stream are not microphone echo. They are duplicate Browser Source instances. The Sound Alerts and Streamlabs help docs converge on the same pattern: streamers copy a browser source URL into multiple scenes by hand, or they leave the alert page open in a separate Chrome tab while OBS also has the source loaded. Either way, both browser instances fire the same alert, separated by a few hundred milliseconds.
Three checks in order:
- Right-click the alert browser source > Properties > tick 'Shutdown source when not visible' AND 'Refresh browser when scene becomes active'. Repeat for every browser source in every scene. This stops alerts firing on hidden scenes.
- Close any browser window that has the alert overlay URL open outside OBS. Streamlabs in particular fires alerts from the dashboard tab as well as from the OBS browser source unless that tab is closed.
- When duplicating an alert across scenes, always use right-click > Copy, then right-click in the target scene > Paste (Reference). Paste (Reference) shares a single source. Plain Paste creates an independent copy and both will play.
The Sound Alerts support article calls out a less obvious case: 'when the same device is set for monitoring that is also being sent to the stream — so even when the Output in the Advanced Audio Properties is off, you and your stream can hear it.' If you set the Sound Alerts browser source to Monitor and Output AND your monitoring device is your speakers AND those speakers are picked up by Desktop Audio, the alert chimes hit the stream three times: once via the source itself, once via the monitor → speakers → mic loop, once via Desktop Audio loopback. Setting the monitoring device to a separate output (a dedicated headphone DAC, or a virtual cable) breaks that loop.
The Twitch dashboard feedback loop
If echo is fine for the first 10 to 15 seconds of a stream and then builds into screeching feedback, the cause is almost certainly your own Twitch dashboard. The Twitch creator dashboard at dashboard.twitch.tv has a stream preview that plays your own broadcast. With Desktop Audio enabled in OBS, that preview audio is captured, sent back to Twitch, picked up by the preview again, and looped. Every cycle takes 10 to 15 seconds (the average Twitch low-latency delay), which is why streamers describe it as 'the echo gets louder until it dies' — by then it has degraded to noise.
The fix is one click. On the Twitch dashboard page, click Mute on the stream preview player. The preview keeps showing the video so you can monitor framing and dropped frames; only the audio path is broken. The OBS forum advice on this is direct: 'If you're streaming to Twitch and have your dashboard open, you need to pause the version that's playing there.' Mute is enough; full pause is not required.
Two related cases. If you ever open your own Twitch channel page in another browser tab on the streaming PC to 'check' the stream, the same loop forms instantly because the player there is unmuted by default. Close the tab or mute the player. And on a multi-monitor setup, if a partner or friend is watching your stream on the same network on a phone with speakers near your mic, the acoustic version of the same loop appears; route that listener to headphones, not speakers.
Speakers into the mic: closed-back headphones fix this
Acoustic echo is the case where your speakers play the stream's own audio (or a Discord voice, or a YouTube clip you are reacting to) and the microphone picks it up. The signal then goes back to the stream as 'your voice plus a delayed copy of itself'. There is no software fix in OBS for this. The microphone is doing what microphones do; the room is the problem.
The single highest-leverage hardware fix is closed-back headphones. The acoustic difference between open-back and closed-back is direct: closed cups trap the audio so it never reaches the microphone. Open-back headphones leak 15 to 25 dB of sound into the room and a sensitive condenser mic 15 cm away will pick that up. The point of closed-back monitoring on a stream is not sound quality. It is feedback prevention. Professional broadcast booths use closed-back exclusively for this exact reason. If a viewer comments 'why am I hearing two of you' and you are on open-back AKG K712s with speakers off and Audio Monitoring already at Off, the headphones are the leak.
Three additional acoustic basics that knock the rest of the echo down without buying new gear:
- Move the microphone 15 to 20 cm from your mouth, not 50 cm. The closer the mic, the higher your voice is in the captured signal relative to anything else in the room.
- Hang a moving blanket on the bare wall directly behind the mic. Bare drywall reflects mid-frequencies straight back; soft fabric absorbs them. Reverb time below 0.5 seconds is the threshold for clean speech, per home-studio acoustic guides.
- Lower the speaker volume below the level your closed-back headphones can mask. If you absolutely cannot use headphones, pull the speakers behind the mic and turn them away. A directional cardioid microphone rejects sound from behind.
If you want to know which microphone makes acoustic echo least likely, our how to choose a microphone for streaming guide breaks down dynamic vs condenser by use case. A dynamic mic like the Shure SM7B or Shure MV7 is roughly 20 dB less sensitive than a typical condenser, which means it picks up far less from speakers and headphone leakage. For mobile, on-the-go and IRL setups, a clip-on lavalier covered in our best lavalier microphone for streaming roundup keeps the mic very close to the mouth and minimises room sound by geometry alone.
VoiceMeeter and VB-Cable routing without echo
Streamers who run a VoiceMeeter Banana or Potato graph hit a class of echo that does not exist on a stock setup. VoiceMeeter sits between Windows and the audio drivers as a virtual mixer. If you point an OBS source at a VoiceMeeter virtual input AND set OBS monitoring back to that same input, the loop forms inside VoiceMeeter without ever touching a real speaker. Same engine, different geometry.
The clean rule for VoiceMeeter + OBS in 2026: only one tool monitors at a time. If VoiceMeeter is doing the monitor mix to your headphones, set every OBS source to Monitor Off in Advanced Audio Properties. If you need OBS to monitor (typical for a single-PC streamer), set Voicemeeter's headphone bus to receive only the inputs you want to hear and never to receive what OBS is sending back.
Two practical setups that work:
- VoiceMeeter Banana, single PC. Mic on Hardware Input 1 → routed to A1 (headphones) and B1 (OBS). Discord and game on virtual inputs → routed to A1 (headphones) and B2 (OBS). OBS captures B1 and B2 as separate Application Audio Capture sources. All OBS monitoring set to Off. No loop.
- VB-Cable single, lighter setup. Set Windows default playback to CABLE Input. Capture CABLE Output in OBS as Audio Input Capture. Set OBS monitoring device to your real headphone DAC, not CABLE. Set the OBS source to Monitor Only so you hear it, but the stream gets the original from CABLE Output.
Common gotcha: in Windows Sound Control Panel, set every device used in this graph to non-exclusive mode (Properties > Advanced > untick 'Allow applications to take exclusive control'). Exclusive-mode access from one app while VoiceMeeter is also addressing the device produces dropouts, glitches, and a flutter that sounds like echo until you trace it.
macOS aggregate device echo and the fix
macOS streamers ran into echo most often when building an Aggregate Device or Multi-Output Device in Audio MIDI Setup to capture desktop audio. The pattern that fails: BlackHole 2ch (or Soundflower) plus the built-in output, set as one Multi-Output Device, then OBS captures BlackHole and also monitors to the same Multi-Output Device. Echo every time.
The fix that works on macOS Sequoia and Tahoe in 2026, drawn from the OBS forum thread on capturing desktop audio: set Desktop Audio to Default in OBS Settings > Audio. Pick your microphone for Mic/Auxiliary Audio. Open Edit > Advanced Audio Properties, set Mic/Aux to Monitor Only (so you hear yourself through OBS without echoing back), and set every other audio source to Monitor Off. Set the OBS Monitoring Device (Settings > Audio > Advanced) to your physical headphones, NOT to the Multi-Output Device. The Aggregate Device is for capture; monitoring should never touch it.
If you are using a USB audio interface (Focusrite Scarlett, Universal Audio Volt, Elgato Wave XLR), prefer its hardware direct-monitor instead of OBS monitoring. Direct monitor on the interface has zero latency by design; the signal never enters software. Software monitoring on macOS through CoreAudio adds 20 to 40 ms even with low buffer sizes, which is enough to make your own voice sound delayed in headphones. With direct monitor on the interface, set every OBS source to Monitor Off and the echo class is closed entirely. The interface picks for music-heavy streams sit in our music streaming equipment guide.
60-second pre-stream echo test
Every echo fix above is invisible until you test. The single most useful pre-stream check in 2026 is a 60-second local recording, not a full Twitch test broadcast. Settings > Output > Output Mode: Advanced > Recording > pick a fast SSD path > set audio bitrate to 160 kbps and audio track to your mic + Desktop Audio. Click Start Recording. Talk for 30 seconds at normal volume, play 10 seconds of music, do 10 seconds of silence, end with a loud laugh. Stop. Open the file in headphones.
What you are listening for, in order:
- Your voice should be one clean track. Any hint of doubling or flange = duplicate-source path; rerun the section above.
- Music should be at the volume you set, not louder, not 2× layered. Doubled music = Desktop Audio + per-source audio capture both enabled.
- Silence should actually be silent. Audible hiss = mic noise floor; soft echo of your voice still trailing = monitoring is leaking into the captured path.
- The laugh should not clip. Clipping above 0 dB = limiter is missing or set too high; this is not echo but it is a related fault that drops viewer retention.
- Total audio offset should be zero. If voice and music are out of phase, sample rates do not match between Windows and OBS. Set both to 48 kHz.
After the local test passes, do a 5-minute private Twitch test stream. Settings > Stream > Twitch > start; set the channel category to 'Just Chatting' and uncheck 'Notify followers' for the test. Open your stream on a phone with headphones. The phone is the second perspective the local recording cannot give you, because it travels through Twitch's actual transcoder. If it sounds clean on the phone, it sounds clean in chat. To check the same broadcast from the network side, run a session through our Twitch Inspector deep-dive. From there you can stop fighting audio and start working on retention; once a stream sounds professional, growth tools like StreamRise can layer real residential viewers on top of content that is already worth watching, instead of pushing eyeballs toward a feed that has a 30-second flange on every Discord call.
Frequently asked questions
Your headphones hear the local microphone path; Twitch hears the OBS output path. The two diverge when a source has Audio Monitoring set to Monitor and Output and the monitoring device is also captured somewhere else. Open Edit > Advanced Audio Properties, set the microphone and any non-alert source to Monitor Off, and the echo on stream usually disappears even though your local headphone monitor sounds the same.
Monitor and Output sends the source through your OBS monitoring device AND to the stream and recording at the same time. It is the right setting for browser source alert chimes, where you want to hear the alert and broadcast it. It is the wrong setting for the microphone, Desktop Audio and game capture; on those sources it creates a delayed feedback path that listeners hear as echo.
Discord is reaching OBS by two routes: through Desktop Audio (because Discord plays through Windows) and through a separate Application Audio Capture or Voice Meeter virtual cable. Pick one route. Either disable Desktop Audio in Settings > Audio and capture Discord with Application Audio Capture, or remove the dedicated Discord source and let Desktop Audio carry it. The recording will then have one clean copy of every voice in the call.
No. The official OBS knowledge base describes the filter as removing 'mild background noise or white noise', meaning fan hum, AC and PC drone. It does not cancel echo. RNNoise, Speex and the NVIDIA noise removal modes inside that filter all target steady-state background noise, not the delayed-duplicate signal that creates streaming echo. Fix the source path; do not stack filters and hope.
Your own Twitch dashboard preview is unmuted on the streaming PC. The preview audio is captured by Desktop Audio, sent back to Twitch, picked up by the preview again, and the cycle repeats every 10 to 15 seconds. Each lap stacks louder. Mute the player on dashboard.twitch.tv and the loop breaks instantly. The video preview keeps working; only the audio is muted on your end.
Closed-back, every time, if you stream with a sensitive microphone. Open-back headphones leak 15 to 25 dB of audio into the room. A condenser microphone 15 cm from your face picks that up and the leaked signal becomes a delayed echo on stream. Closed-back cups trap the audio inside the cup so the mic never hears it. Sound quality on open-back is genuinely better for casual listening, but for the duration of a broadcast the closed-back tradeoff is non-negotiable.
The browser source for alerts is duplicated, almost always because the source was copied into multiple scenes with plain Paste instead of Paste (Reference), or because the alert overlay URL is also open in a separate Chrome tab. Open the source in OBS, right-click > Paste (Reference) into each scene that needs it, and close any browser tab that has the same overlay URL loaded outside OBS.
160 kbps AAC at 48 kHz is the standard. Below 128 kbps the codec produces audible artefacts on consonants and hi-hats; above 192 kbps gives no audible benefit on a Twitch transcode and wastes bitrate that could go to video. Set Settings > Audio > Sample Rate to 48 kHz and Settings > Output > Audio Bitrate to 160. Match Windows Sound > your mic > Properties > Advanced to 16 bit, 48000 Hz so the rates do not drift.